Category Archives: Fiber Optic Tools & Testers

How To Install and Test the Fiber Optic Cables

Share

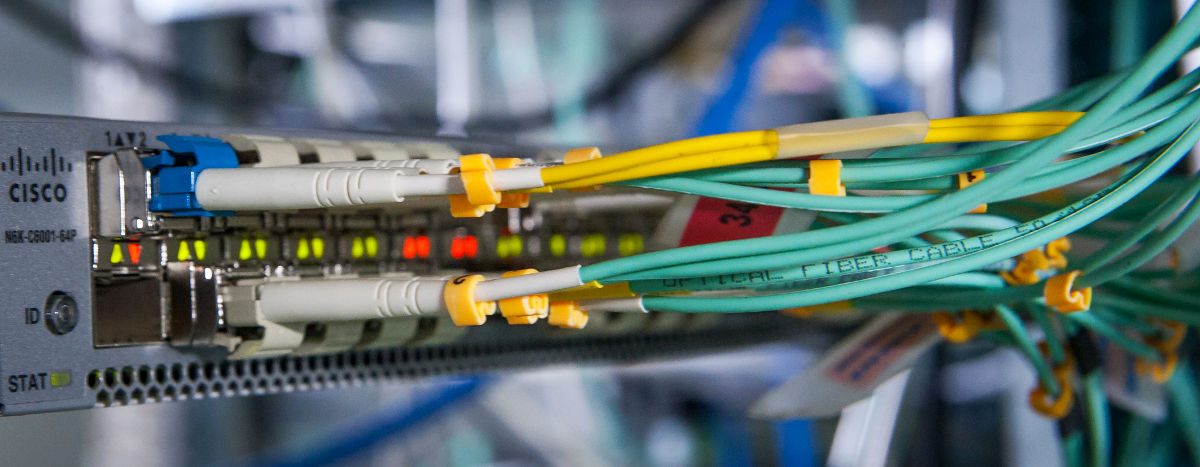
In the telecommunications industry today, how to install the fiber optics that each optical engineer must learn in their work. Don’t froget, when you install the fiber optics, you must testing your fiber optic system. Optical-fiber testing is one of the final and most important procedures in installing optical networks.

How to install the fiber optic cable?

Fiber optic cable may be installed indoors or outdoors using several different installation processes. Outdoor cable may be direct buried, pulled or blown into conduit or innerduct, or installed aerially between poles. Indoor cables can be installed in raceways, cable trays,placed in hangers, pulled into conduit or innerduct or blown though special ducts with compressed gas. The installation process will depend on the nature of the installation and the type of cable being used. Installation methods for both wire and optical fiber communications cables are similar. Fiber cable is designed to be pulled with much greater force than copper wire if pulled correctly, but excess stress may harm the fibers, potentially causing eventual failure.

The install fiber optic cable tips:

a) Follow the cable manufacturer’s recommendations. Fiber optic cable is often custom-designed for the installation and the manufacturer may have specific instructions on its installation.
b) Check the cable length to make sure the cable being pulled is long enough for the run to prevent having to splice fiber and provide special protection for the splices.
c) Try to complete the installation in one pull. Prior to any installation, assess the route carefully to determine the methods of installation and obstacles likely to be encountered.

Testing fiber optic cables steps:

After installation, test each fiber in all fiber optic cables for verification of proper installation. Perform the following tests:
a) Continuity testing to determine that the fiber routing and/or polarization is correct and documentation is proper.
b) End-to-end insertion loss using an OLTS power meter and source. Test multimode cables by using TIA/EIA 526-14 Method B, and single-mode cables using TIA/EIA 526-7 (single-mode). Total loss shall be less than the calculated maximum loss for the cable based on appropriate standards or customer specifications.
c) Optional OTDR testing may be used to verify cable installation and splice performance. However, OTDR testing shall not be used to determine cable loss.
d) If the design documentation does not include cable plant length, and this is not recorded during installation, test the length of the fiber using the length feature available on an OTDR, or some OLTSs.
e) If testing shows variances from expected losses troubleshoot the problems and correct them.

FiberStore is a professional fiber optic cable manufacturer of broad range of fiber optic and copper data communication cabling and connectivity solutions primarily for the enterprise market, offering an integrated suite of high quality, warranted products which operate as a system solutions for seamless integrate with other providers’ offerings. We provide some fiber optic products inculding about simplex fiber optic cable, 10G fiber cable, fiber patch cable, fiber optic transceiver module and so on. Know more info about products or testers or fiber optics tutorial, pls visit our company: www.fs.com.

The Knowledge About Underground Wire Tracer

Share

Why need the underground cable locator in our life. Because more and more underground cable as for the load was increased, their own aging and barbaric construction lead cable often fails is not the normal power supply, thus affecting the living and plant shutdowns, immeasurable loss is caused by the mining and other research units.Now an underground cable locator tester can help you to find the question cable.

FiberStore Underground Wire Tracer NF-816 can be used for testing different types of faults in cables like continuity, dislocation, open circuit, short circuit, cable pairing faults, or indications like shielding indication, straight cable/ cross over cable indication, etc. It can help us quickly to find the questions of the fiber optic cable.

About Underground Wire Locator:

The Underground Wire Tracer/Underground Cable Locator is designed to locate the path of non-energized wires behind walls and underground. The 816 is also capable of locating a specific circuit breaker, pinpointing wires before drilling and verifying dig sites underground. The effective range is up to 3 feet deep and up to 1000 feet in length.

Since its development, the unit consists of a transmitter, model 816T, is equipped with a thumb wheel switch for turning the unit on and adjusting the output level on the front of the unit for use with the large alligator clip leads. Push the switch to select to test”Cable Scan” or”Battery Test” The transmitter is constructed of high impact plastic and is powered by one 9V battery.

The receiver, model 816R, is equipped with a thumb wheel switch for turning the unit on and adjusting the receiver gain. The tracking antenna is attached to the receiver with a 3-foot long cable(such as Cat 7 patch cable). Also is equipped with a White LED light and a external earphone, The receiver has been designed to filter AC power related noise. The receiver is constructed of high impact plastic and is powered by one 9V battery.

The alligator clip leads are available to connect the transmitter to electrical wire, CATV coax, telephone drops, irrigation control wires or metallic pipes.

This locating system is packaged in a toolkit & box with extra batteries, external earphone and has operating instructions in the behind of the toolkit.

Key Features

  • Find wire on all types of connected operating Ethernet switch /Router/PC terminal
  • Rapidly find the target wire from among plenty of telephone wires
  • Rapidly find the target wire from among plenty of network wires
  • It can take place of cable tester
  • Compare the volume of the “tout” sound and the brightness of the signal indicator. Then you can find the target wire which has the highest volume and brightest indicator

Functions

  • Trace telephone wire/LAN cable
  • Trace wire in electrical system
  • Verify LAN cable condition
  • Continuity test
  • DC level testing function
  • Bright white LED flash light

Specification

  • Output voltage(open circuit): 9Vp-p
  • Carrier: 44.75KHz
  • Audio modulation: 900HZ
  • Battery: 9V DC
  • Battery Life (nominal):816T (35 hrs); 816R (20 hrs)
  • Size: transmitter: 49*125*33 mm receiver: 43*168*27mm
  • Color: yellow+ black

If you need any work that might risk you running into an electric cable, do yourself a favor and check first with the help of an underground wire tracer. For more info about Underground Cable Locator NF-816, or need some cheap fiber optic cable. Please contact the sales via sales@fs.com, we will answer your questions as soon as possible.

Understanding Fiber Optic Based Light Source

Share

Each piece of active electronics will have a variety of light sources used to transmit over the various types of fiber. The distance and bandwidth will vary with light source and quality of fiber. In most networks, fiber is used for uplink/backbone operations and connecting various buildings together on a campus. The speed and distance are a function of the core, modal bandwidth, grade of fiber and the light source, all discussed previously. Light sources of the fiber light source are offered in a variety of types. Basically there are two types of semiconductor light sources available for fiber optic communication – The LED sources and the laser sources.

Using single mode fiber for short distances can cause the receiver to be overwhelmed and an inline attenuator may be needed to introduce attenuation into the channel. With Gigabit to the desktop becoming commonplace, 10Gb/s backbones have also become more common. The SR interfaces are also becoming common in data center applications and even some desktop applications. As you can see, the higher quality fiber (or laser optimized fiber) provides for greater flexibility for a fiber plant installation. Although some variations ( 10GBase-LRM SFP+ and 10GBASE-LX4) support older grades of fiber to distances 220m or greater, the equipment is more costly. In many cases, it is less expensive to upgrade fiber than to purchase the more costly components that also carry increased maintenance costs over time.

Light sources of the fiber light source are offered in a variety of types. Basically there are two types of semiconductor light sources available for fiber optic communication – The LED sources and the laser sources.

In fiber-optics-based solution design, a bright light source such as a laser sends light through an optical fiber, called laser light source . Along the length of the fiber is an ultraviolet-light-treated region called a “fiber grating.” The grating deflects the light so that it exits perpendicularly to the length of the fiber as a long, expanding rectangle of light. This optical rectangle is then collimated by a cylindrical lens, such that the rectangle illuminates objects of interest at various distances from the source. The bright rectangle allows line scan cameras to sort products at higher speeds with improved accuracy.

The laser fiber-based light source combines all the ideal features necessary for accurate and efficient scanning: uniform, intense illumination over a rectangular region; a directional beam that avoids wasting unused light by only illuminating the rectangle; and a “cool” source that does not heat up the objects to be imaged. Currently employed light sources such as tungsten halogen lamps or arrays of light-emitting diodes lack at least one of these features.

Guide To Fiber Optic Polishing

Share

Optical fibers require end-surface treatment for proper light propagation and that includes polishing their ends. Polishing is essential for almost all glass-based fibers with cladding diameters larger than 200 microns. Furthermore, all fiber connectors require polishing. The process of fiber optic polishing can occur in the field or in a technical lab, it employs a range of tools and products used to create precision fits and finishes in the delicate glass ends.

There is typical fiber polisher for fiber optic polishing. Fiber Optic Polishing Machines are used to polish the end faces of fiber optic products (cables, connectors, adapters, etc.) in order to minimize signal losses due to scattering. Polishing machines can increase productivity by providing rapid polishing of many different connector styles.

When selecting a fiber polishing machine, there are several features to consider, including adjustable pressure, changeable holders, a timer, and the ability to request custom specifications. Most polishing machines do not offer the flexibility of speed adjustment. This is partially due to the fact that most users only need to handle one type of ferrule material such as zirconia. A slight speed variation does not have significant impact on connector polish result. However, a versatile polisher should have the capability to change speed according the ferrule and polishing film material.

The polishing job typically involves fiber fusion splicer, among other network cable crimping tool and connectors are needed. It also requires 99% isopropyl alcohol, polishing (lapping) film and pad, a polishing puck, and epoxy or adhesive. Some technicians also find needle, syringe, and piano wire useful.

Several Different Polish Options On Fiber Connectors

The different polish of the fiber optic connector ferrules result in different performance of them, mainly on the back reflection (return loss). Generally, PC type is required at least 40dB return loss or higher, UPC is 50dB or higher, APC is 60dB or higher. (As we know, the higher the return loss, the better the performance). Insertion loss of them all should be less than at least 0.3dB, the lower the insertion loss the better the performance.

Things You Need To Mind During Fiber Optic Polishing

It is important not to dwell on any polishing film longer than necessary. Too much polishing can result in undesirable ferrule length, unnecessary polish film wear, and degraded polish finish due to particle accumulation. Make proper adjustments to the recommended polishing time in each step in case they are less than ideal.

Eye protection is always necessary to protect against powerful industrial lasers used in long-distance single-mode networks. Supporting tools may include a visual fault locater to troubleshoot fiber faults and breaks. A fiber-optic inspection microscope permits precision analysis of hair-fine fibers. Additionally, technicians rely upon jacket strippers, cutters, cable slitters, and fusion splicers.

Conclusion

Fiber polishing is a science but much like an art. The science of polishing is crystallized in a well designed machine while the art of polishing reside in the procedure and the continuous effort for improvement by the individual user. The procedure and the training are just as valuable as the polishing machine.

Related Article: FS One-Push Cleaner Introduction and User Guide

How To Test Ethernet Cable With Network Cable Tester

Share

Whether installing new cable or troubleshooting existing cable, cable testing plays an important role in the process. But do you know the process of using cable tester to test Ethernet cable? First we should know the product of Ethernet cable and network cable tester clearly.

About Ethernet Cable
An Ethernet cable is one of the most popular forms of network cable used on wired networks. An Ethernet cable has eight wires that are arranged in four pairs. For current to flow correctly, the wire pairs must be connected in the proper order. Ethernet cables normally support one or more industry standards including Category 5 (CAT5) and Category 6 (CAT6).

Ethernet cables are physically manufactured in two basic forms called solid and stranded. Solid Ethernet cables tend to offer better performance and protection against electrical interference, while stranded cables are less prone to physical cracks and breaks making them more suitable for travelers and portable devices.

Computer networks use Ethernet cables to allow computers in the network to talk to each other. Ethernet cables connect network devices on local area networks such as PCs, modems, routers, switches and Fiber Optic Adapters. They transmit data using the Ethernet protocol.

About network Cable Tester
Basic network cable testers can test for simple connectivity issues but may not identify other problems that cause the cable to malfunction. Cabling may not work when it is near a source of interference or if the cable is too long. Intermittent faults may develop that do not show up when the cable is tested. Sometimes the problem is not sustained long enough to show up on the tester. Professional-level network cable testers may not only tell if an open circuit exists, but may identify where the break is located. Some also identify the gauge of wire used and can generate their own signal to test for interference.

When connected to an Ethernet cable, a network cable tester tells if the cable is capable of carrying an Ethernet signal. If the cable carries the signal, this indicates that all the circuits are closed, meaning that electric current can move unimpeded through the wires, and that there are no short circuits, or unwanted connections, in the wire. Network cable testers vary in complexity and price, but a basic tester consists of a source of electrical current, a measuring device that shows if the cable is good, and a connection between the two, usually the cable itself.

How to test Ethernet cable with Ethernet cable tester?

1.Reboot your modem/router. Unplug the power cord or hold down the reset button on your modem or router. Wait for 30 to 60 seconds then turn your modem/router back on.

2.Wait for your modem/router to re-establish a connection. Depending on your network hardware, it might take two to three minutes. If the problem persists, then try the network cable tester.

3.Turn on the network cable tester and plug one end of the cable into the “IN” Ethernet input on the network cable tester and the other end into the “OUT” input on the network cable tester.

4.Press the “Test” button on the network cable tester. The tester will send a signal across the Ethernet cable. If the signal gets from one end of the cable to the other, the tester will let you know if the test was successful, by displaying a green light, or unsuccessful, by displaying a red light.

5.Replace the Ethernet cable. If the test was unsuccessful, replace the bad Ethernet cable with a good one.

Follow the steps above, you generally know the error during installing new cables or troubleshooting existing cable. Correct it and finally have a smooth network.

Some Info About CCTV Tester Guide

Share

If you have  a CCTV Security Tester or want to install a CCTV, you need to know some info about CCTV Tester to help you to test the CCTV(Closed circuit television) .This article is some info about CCTV Tester guide.

CCTV Tester Product Introduction:

CCTV Security Tester is a kind of multi-function test tool for CCTV and security camera installation professionals. CCTV Camera Tester is developed aiming to CCTV security system installation and maintenance, combining the following function: Optical Fiber Communication test, low power circuit test, video test and PTZ control, and DC12 1A output for camera test, etc. Helps solving varies problem of security system. It could be also used in laboratory tests, equipment maintenance, etc. CCTV Tester is really an ideal multi-function instrument for CCTV Security System, Fiber Optical Communication, CATV and other fiber optic networks.

Some Precaution with CCTV Tester:

1.Precaution before using the tester

A. Make sure to read the user’s manual before using the product.
B. Make sure to check the input and output range of voltage or current at every input and output ports before connecting, so that the system cannot be overloaded.
C. The following operational environment should be maintained constantly:

  • Temperature: -30℃—70℃
  • Relative humidity: 30% ~ 90%
  • Recharging voltage: 9V —12V

2.Precautions when using the tester

A. Do not use the tester in damp humidity or leaking gas environments.
B. Do not touch the tester with wet hands.
C. Be mindful not to shock or shake the tester while in use to avoid damage.
D. Avoid the places of strong magnetism or electric wave, which could cause incorrectmeasuring.
E. Be careful not to expose the ports or joints to dirt or liquid.
F. Do not disassemble the tester.

3.Precautions for battery charging and using

A. Use only original chargeable battery with the tester, when charge the batteries, please use the original power adapter.
B. Make sure not to disorient the polarization of batteries.
C. Do not short-circuit or disassemble batteries.

CCTV Tester Features and function:

A. Video test
The video signal and the quality of picture can be tested.
B. PTZ controlling
It has the basic operational test of PTZ products, function include pan/tilt, zoom in/out,preset setting and operation, speed adjustment etc; support multi-protocol and baudrate, communication via RS-232, RS422 simplex and RS485 port.
RS485 protocol provided with the CCTV Tester include: Pelco D,Pelco P, Samsung, Panasonic, Molynx. Additional Protocols may be added as per customer requests.
Baud rate include: 2400, 4800, 9600, 19200.
C. Power to camera
The CCTV Tester has a DC 12V output rated at 400mA max for providing power to the camera. This will make camera testing using the CCTV Tester an easier task.
D. Digital Multi-meter
The CCTV Tester Multi-Meter function provides for AC/DC voltage and resistance to be measured providing the installer with additional diagnostic capability for finding and localizing faults.
E.Videp signal attenuation analyzing
The CCTV Tester can analyse the video signal and display peak and average video signal level and sync pulse level to determine whether the video signal level is at the optimum level for displaying a good picture in sync and for determing cable losses.
F. UTP cable test
The wiring condition (disconnected, short of UTP cable) can be tested and show inthe screen clearly.
G. Video signal generating
It can output Green, white Black and Blue screen to allow technician to inspect videomonitor or DVR. The generating signal support PAL or NTSC (don’t support bothmeanwhile) format.
H. RS485 data test
It can test the RS485 data sent from controlling device, display the hexadecimal datacontent for engineer to analyze

Power And Battery Operation Introduction:

A. The power slide switch is located at the side of the tester. Turn the power slide switch on to power on the tester, to press the Power more than 3 seconds to make it turn into sleeping mode.
B. Press the Power more than 3 seconds to turn on the tester after it turning to sleeping mode.
C. Press the Power less than 1 second to shut off the OSD menu.
D. Turn the power slide switch off to power off the tester.
E. The batteries should be plugged in over 5 hours for full charge, when charged the Charge Indicating LED will on.
F. After full charging, the Charge Indicating LED light will glitter and the charging work can stop automatically.
G. The charged batteries can operate for 5 hours or more.
H. When the battery indicator in system information menu shows 25 (the status number includes 100, 90, 75, 50, 25, 5), please recharge it for use.
I. The tester can be used when it is being charged.

For more other testers info, pls focus on Fiber Optic Test ,it has many testing tutorial in this part. Fiberstore not only provide the fiber tester, but also has some fiber optic tools.Such as crimping tool,wire cutter,punchdown tool.

Crimping Tool Types And Operation

Share

The crimping tool is used for creating a joint between two metal pieces or other materials with good malleability. The joint formed by crimping needs to be strong to ensure that the application works properly. Crimping tools are available in different types to support various types of applications. FiberStore is a good crimping tools supplier.  We provide many types of crimping tools in all possible varieties so that the purchasers are able to make the right choice while being in our store.

For example, the structured cabling system lays stress on following the practices which will add elegance, discipline, method and reliability to cabling. The tools which are used in installation of a cabling system go a long way in and can sustain extensive use in the field. Modular Crimping Tool can be used to crimp RJ-45 (related products: rj45 plug) and RJ-11 types of fiber connectors. It is a highly compact and rugged tool and is meant for continuous use in the field. The parallel action design maintains accurate.

Hand operated crimpers are the most frequently used of all cable crimping tools. Most are designed in a basic plier pattern with one or a number of crimping points machined into their jaws. This type of tool is typically used to effect smaller crimps on steel cables, electrical connections and terminations, preinsulated lugs and ferrules, and RJ type plugs. The crimp points on hand crimpers are either half round compression or cup and tab crimp type designs. This type of crimper is generally used to crimp steel or copper ferrules or sleeves to join two lengths of steel or electrical cable.

Types of Crimping Tools

First and foremost, you must offer these them manufactured in different types. Different customers might come and ask for a specific type. learn about different types of tools used for crimping form the below list:

1.Cable tie tools are the crimping tools used to tighten the ties around the bundles of wires or cables.
2.Compression crimp tools are used for terminating twisted-pair modular plugs and coaxial compression connectors.
3.RJ45 crimp tools are used for crimping the wires of various connectors like RJ45, RJ-11, RJ-12 and so on.
4.Point to cup tools are used with round section crimp sleeves. Besides, there are cup to cup tools available in different varieties like standard duty tool, heavy duty tool and bench press tool.

8P8C RJ-45 Network Cable Crimping Tool HT-210C

Crimp Tool Operation

A crimping tool is an essential part of the crimping process, the other parts being the terminal and wire. Terminal size is largely universal and can accept many sizes of gauged wire, which can also vary widely within the same nominative value. As such, the crimp tool is a means of compressing the terminal to both the wire’s insulation (for positioning) and the wire’s brush (for conduction).

The quality of the tooling determines the quality of the crimp design. Common considerations include if the volume of crimping deserves an automated wire stripping and process machine, or if the application is better suited by an on-site, handheld crimping tool. Many tools will have two crimping cavities to properly roll the terminal’s crimps, and possibly more if there are two conductors in the wire. Some crimp tools will feature several gauge sizes and possibly a stripper to enhance the crimper’s utility. Crimp tools may also feature interchangeable dies. Die-less crimpers are meant for general applications.

Fiberstore supplies a wide variety of specialized cable crimping tool, modular crimping tool, network cables crimpers which are all at very competitive price to help you get the job done right. For more information, please contact our sales representative right now.

Related Article: https://www.cables-solutions.com/used-the-crimping-tool-to-made-a-rj45-plug.html

More And More Important Of Fiber Optic Splicing

Share

Fiber Optics Splicing is starting to become an even more and more common skill dependence on cabling technicians. Fiber-optic cables might have to be spliced together for many reasons-for example, to produce a link of your particular length, or to repair a damaged cable or connection. One of the links of 10 km may be installed by splicing several fiber-optic cables together. The installer will then fulfill the distance requirement and get away from investing in a new fiber-optic cable. Splices could possibly be required at building entrances, wiring closets, couplers, and literally any intermediate point between a transmitter and receiver. When we used the fiber optic splicer to fiber optic cable splicing, our greatest problem is the preservation in the expertise of the signal.

A special touch is necessary to splice fiber optic cable considering that the glass fibers are encased with fiber insulation sealed inside a plastic coating. Unlike copper, the fibers are delicate and is easily broken by using a lot of pressure to reduce the casing while splicing cables to fiber connectors.

The splicing process begins by preparing each fiber end for fusion. Fusion splicing mandates that all protective coatings be taken off the ends of each one fiber. The fiber is then cleaved using the score-and-break method. Each fiber face to attain a good optical finish by cleaving and polishing the fiber end. Before the connection is created, get rid of each fiber will need to have an even finish that is clear of defects for example hackles, lips, and fractures. These defects, along with other impurities and dirt affect the geometrical propagation patterns of light and cause scattering. The standard of each fiber end is inspected utilizing a microscope. In fusion splicing, splice loss is a direct purpose of the angles and excellence of both fiber-end faces.

The fusion splicing is one kind of a splice cables method. The basic fusion-splicing apparatus is made up of two fixtures on what the fibers are mounted with two electrodes. An inspection microscope assists in the location from the prepared fiber ends into a fusion-splicing apparatus. The fibers are positioned into the apparatus, aligned, after which fused together. Initially, fiber optic fusion splicer used nichrome wire because the heater to melt or fuse fibers together. The heater almost always is an electric arc that softens two butted fiber ends and permits the fibers to be fused together.

In Mechanical Splicing, mechanical splices are only alignment devices, meant to retain the two fiber ends up in a precisely aligned position thus enabling light to feed in one fiber in to the other. Mechanical splicing is conducted in the optical junction the location where the fibers are precisely aligned and kept in place by a self-contained assembly, not just a permanent bond. This method aligns both the fiber ends into a common centerline, aligning their cores and so the light can pass in one fiber to another. It might be is accomplished with a portable workstation utilized to get ready each fiber end. That preparation includes stripping a thin layer of plastic coating in the fiber core before its splicing.

Connecting two fiber-optic cables requires precise alignment of the mated fiber cores or spots in a single-mode fiber-optic cable. This is required so that virtually all the sunshine is coupled derived from one of fiber-optic cable across a junction to the other fiber-optic cable. Actual contact between your fiber-optic cables isn’t even mandatory.

Splices can also be used as optical attenuators if there is a requirement to attenuate a high-powered signal. Splice losses up to 10.0 dB might be programmed and inserted in the cable if desired. Using this method, the splice can work as an in-line attenuator using the characteristic non reflectance of an fusion splice. Typical fusion-splice losses could be estimated at 0.02 dB for loss-budget calculation purposes. Mechanical splices are easily implemented in the field, require no tooling, and give losses of approximately 0.5 to 0.75 dB.

FiberStore provides a comprehensive range of hand tools, network tool kits and consumables for the installation and maintenance of LAN, fibre optic and copper networks. Whether you require a punchdown tool, RJ45 / Cat 5 Crimping tool, fiber splicer or automatic wire stripper or a complete network tool kit, FiberStore has the right tools for your needs. We provide fully automatic fibre optic fusion splicers from Fujikura for multimode and singlemode optical fibre cables, ensuring the best fibre termination possible whether an expert or a novice.

Some Steps Of CCTV Installing And CCTV Tester

Share

CCTV(Closed-circuit television) uses one or more video cameras to send out video and sometimes audio images to a monitor, group of monitors, or video recorder. The real difference between CCTV and standard TV is the fact that standard TV openly broadcasts signals to the public. CCTV is not openly transmitted to the public. CCTV uses either wireless or wired transmission to send the broadcast from your cameras on the monitor or recorder. Most CCTV systems can be used surveillance, that may include security monitoring, spying, or safety monitoring. CCTV systems have become extremely popular over the past a long time since the technology has improved and be cheaper. Virtually all CCTV cameras being used today are generally for surveillance and security purposes. CCTV systems are available in nearly all bank, casino, mall, and big mall. CCTV systems have grown to be so affordable, most smaller mom and pop stores also have CCTV systems included for security purposes. To install a cctv in your life, you must have a cctv tester to testing the equipment, make sure the CCTV systems can work. Testing is very important to complete the project on agreed deadline and not to overspend or duplicate the work.

Install:

a. Ensure that the cables you might need to use is right.
b. Ensure that the cameras are in the correct location.
c. Ensure that you will find a proper reason for entrance externally of the house for the inside.
d. Find the best area for the screen and DVR to become stationed.
e. Find a sort of large capacity DC voltage because the energy with the CCTV video cameras.
f. After all the previous steps have being carried out, a appropriate CCTV security camera tester should be required.

Test:

The CCTV tester may be the useful gizmo for CCTV system, that is experiencing a leap in technology using digital techniques and also the Internet.CCTV tester can be used for displaying video, controlling PTZ, generating images, capturing data of RS485 and testing LAN cable etc. Its functions, easy operation, and convenient portability enable it simple for that contractor to set up and look after the playback quality camera, promote working efficiency and cost-down the expenditure from the project. .

Fiberstore is a professional fiber optic products supplier, you also can find other optical fibre products ethernet card, fiber switch, fiber optic connectors, etc. Welcome to our store to choose your fiber optic products.

4 steps in Fiber Optic Fusion splicer

Share

Fiber Optic Fusion splicer may be the act of joining two optical fibers end-to-end using heat. The thing is to fuse both the fibers together in such a way that light passing with the fibers is not scattered or reflected back from the splice, and thus the splice as well as the region surrounding it are almost as strong because virgin fiber itself. The basic fusion splicer apparatus includes two fixtures which the fibers are mounted and two electrodes. Inspection microscope assists in the placement in the prepared fiber ends into a fusion-splicing apparatus. The fibers they fit in to the apparatus, aligned, and then fused together. Initially, fusion splicing used nichrome wire as the heating unit to melt or fuse fibers together. New fusion-splicing techniques have replaced the nichrome wire with fractional co2 (CO2) lasers, electric arcs, or gas flames to heat the fiber ends, causing them to fuse together. The little size of the fusion splice along with the development of automated fusion-splicing machines make electric arc fusion (arc fusion) the most popular splicing approaches to commercial applications.

Splicing fiber optic cable ends together is often a precise process with hardly any room for error. This is because the optical fiber ends must be gathered absolutely perfectly to be able to minimize potential optical loss or light leakage. Properly splicing the cable ends demands the usage of a high-tech tool called a fusion splicer. A fusion splicer perfectly mates the optical fiber ends by melting or fusing them to the other. Splicing fiber cables surpasses using connectors considering that the fusing process results in a superior connection that features a lower level of optical loss. Now,I will introducts 4 steps to fusion splicing.

Step1

Know that fusion splicing is essentially several optical fibers being permanently joined together by welding utilizing an an electric arc. The need for an exact cleaver is suggested should you desire less light loss and reflection problems. Understand that an excellent cleaver just for this precise work is nessary. If your poor spice is created, the fiber ends may well not melt together properly and problems can arise.

Step2

Prepare the fiber by stripping the coatings, jackets and tubes, ensuring only bare fiber is left showing. You will need to clean all of the fibers associated with a filling gel. A clean environment is imperative for a good connection.

Step3

Cutter the fiber. A great wire cutter is suggested to secure a successful splice. When fusing the fibers together, either align the fibers manually or automatic, determined by what type of fusion splicer you’ve got. When you’ve got a new proper alignment, a power arc can be used to melt the fibers together creating a permanent weld of these two fiber ends.

Step4

Protect the fiber with heat shrink sleeve, silicone get. This can maintain your optical fiber resistant to any outside elements it may encounter or future breakage.

Alternatives to fusion splicing include using fiber optic connectors or mechanical splices because both versions have higher insertion losses, lower reliability far better return losses than fusion splicing. Want to know more about fiber splicer knowledges, pls visit fs.com to find your answer.